How to achieve brighter skin at home naturally

Friday, January 31, 2025

Unlock Your Radiance: Achieving Brighter Skin Naturally at Home

Hey there, gorgeous! So you're looking for that healthy, radiant glow? We've all been there â€" staring in the mirror, wishing for brighter, more even-toned skin. The good news? You don't need expensive spa treatments or harsh chemicals to achieve it. Let's dive into the world of natural skin brightening, and uncover the secrets to a naturally luminous complexion right from the comfort of your own home.

Understanding Your Skin

Before we jump into specific remedies, let's talk about your skin. Everyone's skin is unique, and what works wonders for your friend might not be the best for you. Understanding your skin type â€" oily, dry, combination, or sensitive â€" is crucial for choosing the right natural ingredients and methods. Pay attention to how your skin reacts to different products and adjust your routine accordingly. If you have any underlying skin conditions like acne or eczema, it's always best to consult a dermatologist before trying new things.

The Power of Hydration: Drink Up!

Okay, let's start with the most straightforward tip â€" hydration! Drinking plenty of water is not just good for your overall health; it's essential for healthy, glowing skin. Water helps flush out toxins, keeps your skin plump and hydrated, and prevents dryness, which can dull your complexion. Aim for at least eight glasses of water a day, more if you're active or live in a hot climate. You can also boost your hydration by eating fruits and vegetables with high water content, like watermelon, cucumbers, and spinach.

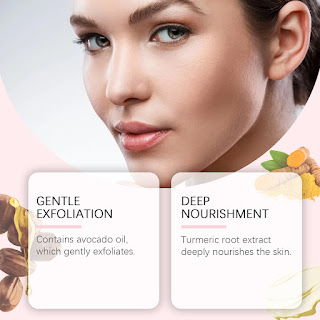
Gentle Exfoliation: Unveiling Your Radiance

Exfoliation is key to revealing brighter skin. It helps remove dead skin cells that can make your complexion look dull and uneven. But be gentle! Harsh scrubs can irritate your skin, so opt for natural, gentle exfoliants.

Natural Exfoliants to Try:

  • Sugar scrub: Mix sugar with a little honey or olive oil for a simple and effective scrub. The sugar gently buffs away dead skin cells, while the honey or olive oil moisturizes.
  • Oatmeal scrub: Grind some rolled oats into a fine powder and mix it with water or yogurt to create a paste. Oatmeal is gentle yet effective at exfoliating and soothing sensitive skin.
  • Coffee grounds: Used coffee grounds can be mixed with a carrier oil (like coconut oil or olive oil) to create a stimulating scrub. The caffeine can also help reduce puffiness.

Remember to exfoliate gently and not too often â€" once or twice a week is usually enough. Over-exfoliating can damage your skin barrier and lead to irritation.

Brightening Face Masks: The Natural Approach

Face masks are a fun and effective way to pamper your skin and boost its radiance. Many natural ingredients have skin-brightening properties.

DIY Face Masks for Brighter Skin:

  • Turmeric mask: Turmeric has powerful anti-inflammatory and brightening properties. Mix a teaspoon of turmeric powder with a little yogurt or honey to create a paste. Apply it to your face, leave it on for 15-20 minutes, and then rinse off. (Note: Turmeric can stain, so be careful!)
  • Lemon juice mask (use cautiously): Lemon juice is a natural bleaching agent, but it can be harsh on sensitive skin. If you have sensitive skin, dilute it significantly with water or honey. Apply it to your face for a few minutes and rinse thoroughly. Always follow up with a moisturizer.
  • Yogurt mask: Yogurt contains lactic acid, which helps gently exfoliate and brighten the skin. Apply plain yogurt to your face, leave it on for 15-20 minutes, and then rinse.
  • Aloe vera mask: Aloe vera soothes and hydrates the skin, helping to even out skin tone and reduce redness. Apply aloe vera gel directly to your face and let it dry.

Always do a patch test before applying any new mask to your entire face, to check for any allergic reactions.

The Importance of Sunscreen: Protecting Your Investment

All the natural brightening methods in the world won't matter if you don't protect your skin from the sun! UV rays are the biggest culprits behind premature aging, dark spots, and uneven skin tone. Always use a broad-spectrum sunscreen with an SPF of 30 or higher, every day, even on cloudy days. This is arguably the most important step in maintaining bright and healthy skin!

Lifestyle Choices for Radiant Skin

Your skin reflects your overall health. A healthy lifestyle contributes significantly to brighter skin.

Healthy Habits for Glowing Skin:

  • Eat a balanced diet: Focus on fruits, vegetables, and whole grains. These provide essential vitamins and antioxidants that support healthy skin.
  • Get enough sleep: Sleep deprivation can lead to dull, tired-looking skin. Aim for 7-8 hours of quality sleep each night.
  • Manage stress: Stress can trigger hormonal imbalances that affect your skin. Practice stress-reducing techniques like yoga, meditation, or spending time in nature.
  • Limit alcohol and caffeine: These can dehydrate your skin and contribute to dullness.
  • Quit smoking: Smoking damages collagen and elastin, leading to premature aging and dull skin.

Consistency is Key

Achieving brighter skin is a marathon, not a sprint. Be patient and consistent with your skincare routine. It may take several weeks or even months to see significant results. Don't get discouraged if you don't see instant changes â€" keep up the good work, and you'll be rewarded with radiant, healthy skin!

Commonly Asked Questions

Q: How often should I exfoliate?

A: Once or twice a week is generally sufficient. Over-exfoliating can irritate your skin.

Q: Are there any foods that can help brighten my skin?

A: Foods rich in antioxidants, vitamins C and E, and omega-3 fatty acids are beneficial. Think berries, citrus fruits, leafy greens, nuts, and fatty fish.

Q: My skin is sensitive. What natural remedies are safe for me?

A: Aloe vera, yogurt, and oatmeal are generally gentle and suitable for sensitive skin. Always do a patch test before applying anything new to your entire face.

Q: How long does it take to see results?

A: Results vary, but you might start to see improvements within a few weeks of consistent effort. Be patient and keep at it!

Q: What if my skin doesn't improve?

A: If you're not seeing any improvement after several weeks of consistent effort, it's a good idea to consult a dermatologist. They can help identify any underlying skin conditions or recommend other treatment options.

Remember, everyone's skin is different, so finding what works best for you might involve a little trial and error. Be patient, listen to your skin, and enjoy the journey to a brighter, more radiant you!

Read More..

How to brighten skin using rice water and aloe vera

Unlock Your Radiance: A Deep Dive into Rice Water and Aloe Vera for Brighter Skin

Hey there, gorgeous! So you're looking for brighter, healthier skin, and you've heard about the magic of rice water and aloe vera? You've come to the right place! I'm going to spill all the tea â€" or rather, all the rice water and aloe â€" on how to use these natural powerhouses to achieve that radiant glow you've always dreamed of. We'll explore the science behind their benefits, how to prepare these amazing ingredients, and how to incorporate them into your skincare routine for optimal results. Get ready to ditch those expensive creams and embrace the power of nature!

Understanding the Power Players: Rice Water and Aloe Vera

Before we dive into the how-to, let's talk about why rice water and aloe vera are such fantastic choices for brighter skin. They're not just trendy ingredients; they've been used for centuries for their skincare benefits.

The Magic of Rice Water

Rice water, the milky liquid left over after rinsing rice, isn't just for discarding! It's packed with antioxidants, vitamins, and minerals that work wonders for your skin. Specifically, it's rich in:

  • Ferulic acid: A potent antioxidant that protects your skin from damage caused by free radicals (those pesky things that contribute to aging and dullness).
  • Allantoin: Soothes inflammation and irritation, helping to calm redness and acne.
  • Inositol: A carbohydrate that helps improve skin hydration and elasticity, leading to a smoother, more youthful appearance.
  • Minerals: Such as zinc and selenium, which contribute to overall skin health and repair.

These combined benefits contribute to a brighter complexion by reducing inflammation, improving skin texture, and promoting cell regeneration. Over time, you'll notice a significant improvement in skin tone and clarity.

The Soothing Power of Aloe Vera

Aloe vera, a succulent plant known for its medicinal properties, is another superstar in the skincare world. Its gel is a treasure trove of goodness, containing:

  • Vitamins: Including A, C, and E, all crucial for healthy skin cell function and antioxidant protection.
  • Minerals: Like zinc and magnesium, which contribute to skin repair and hydration.
  • Enzymes: That help to gently exfoliate the skin, removing dead skin cells and revealing brighter, fresher skin underneath.
  • Anti-inflammatory compounds: That soothe irritated skin, reduce redness, and accelerate healing.

Aloe vera's ability to soothe, hydrate, and gently exfoliate makes it the perfect partner for rice water in achieving a brighter complexion. It helps to balance the skin's pH and creates a smooth base for the rice water to work its magic.

Preparing Your Miracle Ingredients

Now for the fun part! Let's learn how to prepare both rice water and aloe vera for optimal skin benefits.

Making Rice Water: The Easy Way

There are two main methods: fermented and unfermented. Unfermented rice water is simpler and great for beginners. Simply rinse one-half cup of rice (white or brown works fine) under cold water until the water runs clear. Then, add two cups of water, let it sit for 30 minutes, and strain. You can store the rice water in the refrigerator for up to a week.

Fermented rice water is slightly more involved, but many swear by its extra potent benefits. It involves letting the rice water sit at room temperature for 24-48 hours, allowing beneficial bacteria to develop. Just be sure to keep an eye on it, as it might start to smell a little tangy (that's perfectly normal!). Always ensure proper hygiene if making fermented rice water.

Harvesting Aloe Vera Gel

If you have an aloe vera plant, you're in luck! Gently cut off a leaf, carefully slice it open lengthwise, and scoop out the gel with a clean spoon. You can also find 100% pure aloe vera gel at most health food stores or pharmacies. Be mindful of added ingredients and preservatives, though. Pure aloe is best for skincare.

Creating Your Brightening Skin Elixir

Now, let's combine the power of rice water and aloe vera to create your very own brightening skin elixir. There are several ways to do this:

Simple Mix & Apply

The easiest method is to simply mix equal parts of rice water and aloe vera gel in a small bowl. Stir gently until well combined. Apply this mixture to your face and neck after cleansing, leave it on for 15-20 minutes, and then rinse with cool water. This is a great way to start!

DIY Toner

Create a refreshing toner by mixing one part rice water with one part aloe vera. Store the mixture in a spray bottle in the fridge. After cleansing, spritz your face and neck with the toner throughout the day for an extra boost of hydration and brightness.

Overnight Mask

For an extra intensive treatment, combine rice water and aloe vera, add a teaspoon of honey (for extra moisture and antioxidants), and apply a thick layer to your face as an overnight mask. Rinse thoroughly in the morning. (Be sure to do a patch test if you’re trying something new on your skin!).

Incorporating into Your Routine

Consistency is key! Aim to use your rice water and aloe vera concoction at least twice a week, or even daily if your skin tolerates it well. Remember to always start slow and patch test before applying anything new to your whole face.

It's crucial to listen to your skin. If you experience any irritation, redness, or itching, stop using the mixture immediately and consult a dermatologist. Everyone's skin is different, and what works for one person might not work for another.

Pair your rice water and aloe vera routine with a healthy diet, plenty of water, and sun protection for the best results. A balanced approach to skincare will always give you the best results.

Commonly Asked Questions

Let's address some frequently asked questions about using rice water and aloe vera for brighter skin:

  • Q: How long does it take to see results? A: Results vary depending on your skin type and consistency. Some people see improvements in a few weeks, while others may need a couple of months to notice a significant difference.
  • Q: Can I use this on all skin types? A: While generally gentle, sensitive skin may need a patch test before applying to the whole face. It is rarely irritating, but it's always best to be cautious.
  • Q: Can I use this alongside other skincare products? A: Yes, but introduce it gradually to avoid overwhelming your skin. Start by using it once or twice a week before incorporating it into your daily routine.
  • Q: What if my skin feels sticky after using the mixture? A: If you feel your skin is too sticky after applying the mixture, try using a smaller amount or rinsing it off with cool water.
  • Q: Can I freeze the rice water and aloe vera mixture? A: It's best not to freeze the mixture as it can alter its consistency and effectiveness. Store it in the fridge instead.

I hope this comprehensive guide helps you unlock your radiant glow! Remember to be patient, consistent, and listen to your skin. Enjoy the journey to brighter, healthier skin!

Read More..

How to brighten skin using ayurvedic treatments at home

Achieving Radiant Skin: A Comprehensive Guide to Ayurvedic Home Treatments for Skin Brightening

Ayurveda, the ancient Indian system of medicine, offers a holistic approach to health and well-being, encompassing the mind, body, and spirit. Its principles emphasize the importance of balance and harmony within the individual, and this philosophy extends to skincare. Ayurvedic treatments for skin brightening focus not merely on superficial enhancements but on addressing the underlying causes of dullness and uneven skin tone, promoting a radiant complexion from within. This comprehensive guide explores various home remedies, backed by Ayurvedic principles, to help you achieve naturally brighter skin.

Understanding Ayurvedic Principles for Skin Health

Before delving into specific treatments, it's crucial to understand the Ayurvedic perspective on skin health. Ayurveda categorizes individuals into three doshas â€" Vata, Pitta, and Kapha â€" based on their unique constitution. Each dosha has specific characteristics and imbalances can manifest as skin issues. Understanding your dominant dosha is key to selecting appropriate treatments.

Identifying Your Dosha

Determining your dosha often requires consultation with an Ayurvedic practitioner. However, self-assessment questionnaires are available online to provide a general indication. Knowing your dosha allows for personalized treatment plans, maximizing effectiveness and minimizing potential adverse reactions.

Dosha-Specific Skin Concerns

  • Vata: Characterized by dryness and sensitivity, Vata imbalances can manifest as dry, flaky, or irritated skin. Treatment focuses on hydration and nourishment.
  • Pitta: Associated with inflammation and heat, Pitta imbalances may result in redness, acne, or sunburn. Treatments emphasize cooling and soothing properties.
  • Kapha: Linked to sluggishness and accumulation, Kapha imbalances can lead to oily, congested skin prone to breakouts. Treatments focus on detoxification and balancing oil production.

While understanding your dosha is helpful, many treatments discussed below offer benefits across all doshas, promoting overall skin health.

Ayurvedic Home Remedies for Skin Brightening

The following Ayurvedic home remedies utilize natural ingredients known for their skin-brightening and rejuvenating properties. Always perform a patch test before applying any new remedy to your entire face to check for allergies or sensitivities.

1. Turmeric Face Mask

Turmeric (Curcuma longa) is a potent anti-inflammatory and antioxidant, known for its skin-brightening capabilities. A simple turmeric face mask can be prepared by mixing turmeric powder with a carrier such as milk, yogurt, or honey. Apply the paste to your face, leave it on for 15-20 minutes, and then rinse thoroughly with lukewarm water. Regular use can help reduce blemishes and improve skin tone.

2. Sandalwood Paste

Sandalwood (Santalum album) is revered in Ayurveda for its cooling and soothing properties. It helps to reduce inflammation, improve skin texture, and impart a radiant glow. A paste can be made by grinding sandalwood into a fine powder and mixing it with rose water or milk. Apply the paste to your face, leave it on for 15-20 minutes, and rinse with water.

3. Multani Mitti (Fuller's Earth) Mask

Multani mitti is an excellent natural cleanser that absorbs excess oil and impurities. Mixing multani mitti with rose water or milk creates a paste that can be applied to the face, left on for 15-20 minutes, and then rinsed off. This mask is particularly beneficial for oily and acne-prone skin.

4. Neem Leaf Paste

Neem (Azadirachta indica) possesses potent antibacterial and antiseptic properties. A neem leaf paste, prepared by grinding fresh neem leaves, can be applied topically to treat acne and reduce inflammation. This remedy is beneficial for those with oily and acne-prone skin.

5. Gram Flour (Besan) Scrub

Gram flour (Cicer arietinum) acts as a gentle exfoliant, removing dead skin cells and revealing brighter skin underneath. Mix gram flour with milk or yogurt to form a paste. Gently massage the paste onto your skin in circular motions, leave it on for a few minutes, and then rinse. This scrub helps to improve skin texture and promote a radiant complexion.

6. Aloe Vera Gel

Aloe vera is widely known for its soothing and healing properties. Its gel can be directly applied to the skin to reduce inflammation, treat sunburns, and promote skin regeneration. Regular application can contribute to a more even and brighter skin tone.

7. Coconut Oil

Coconut oil, rich in fatty acids and antioxidants, is an excellent moisturizer. Applying coconut oil to the skin, especially at night, helps to hydrate and nourish, improving skin elasticity and reducing the appearance of wrinkles and fine lines. This contributes to a healthier and more radiant complexion.

Lifestyle Changes for Brighter Skin

Ayurveda emphasizes the importance of holistic health for radiant skin. In addition to topical remedies, incorporating these lifestyle changes can significantly enhance your skin's health and brightness:

1. Balanced Diet

Consume a diet rich in fruits, vegetables, and whole grains. Limit processed foods, sugary drinks, and excessive caffeine intake. A balanced diet provides essential nutrients that support healthy skin.

2. Adequate Hydration

Drink plenty of water throughout the day to keep your skin hydrated and flushed out of toxins. Dehydration can lead to dry, dull skin.

3. Adequate Sleep

Aim for 7-8 hours of quality sleep each night. Sufficient sleep allows your skin to repair and regenerate itself, contributing to a brighter and healthier complexion.

4. Stress Management

Chronic stress can negatively impact skin health. Practice stress-reducing techniques such as yoga, meditation, or deep breathing exercises.

5. Sun Protection

Protect your skin from harmful UV rays by using sunscreen with a high SPF, especially during peak sun hours. Sun damage can lead to premature aging and uneven skin tone.

By incorporating these Ayurvedic home treatments and lifestyle modifications, you can pave the way towards achieving naturally brighter and healthier skin. Remember that consistency is key, and results may vary depending on individual factors. For personalized guidance and treatment plans, consulting an Ayurvedic practitioner is highly recommended.

Read More..

Traditional whitening remedies with goat milk and saffron

Tuesday, January 28, 2025

Unveiling the Secrets: Goat Milk and Saffron for Radiant Skin

For centuries, women have sought natural ways to enhance their beauty, turning to ingredients found in nature. Among these ancient remedies, goat milk and saffron stand out as potent allies in the quest for radiant, even-toned skin. These ingredients, rich in vitamins, minerals, and antioxidants, offer a gentle yet effective approach to skin whitening, addressing concerns like hyperpigmentation and uneven skin tone. Let's delve into the traditional wisdom surrounding these remarkable ingredients and explore how they work their magic.

The Power of Goat Milk: Nature's Gentle Cleanser and Brightener

Goat milk, often lauded for its skincare benefits, boasts a unique composition that makes it ideal for brightening the complexion. Unlike cow's milk, goat milk contains smaller fat globules, allowing for easier absorption into the skin. This facilitates the delivery of beneficial components like lactic acid, a gentle alpha-hydroxy acid (AHA). Lactic acid acts as a natural exfoliant, gently removing dead skin cells that can dull the skin's appearance. It also helps to stimulate cell turnover, revealing brighter, more even-toned skin underneath. Furthermore, goat milk is a rich source of vitamins A and E, potent antioxidants that combat free radical damage, contributing to a healthier, more youthful complexion. This combination of exfoliation and antioxidant protection makes goat milk a truly remarkable ingredient for skin brightening.

Harnessing the Benefits: Goat Milk Applications

You can incorporate goat milk into your skincare routine in several ways. A simple yet effective method involves applying raw goat milk directly to your face, letting it sit for 15-20 minutes before rinsing with lukewarm water. This provides a gentle cleansing and moisturizing experience. Alternatively, you can create a homemade face mask by combining goat milk with other natural ingredients like honey or oatmeal for added benefits. Remember to always perform a patch test before applying any new ingredient to your entire face to check for any allergic reactions.

Saffron's Golden Touch: Anti-Inflammatory and Brightening Properties

Saffron, the world's most expensive spice, holds a revered place in traditional beauty practices. Its vibrant color and potent properties contribute to its efficacy in skin whitening. Crocin, a key carotenoid in saffron, is responsible for its striking color and boasts potent antioxidant and anti-inflammatory properties. These properties help to reduce inflammation associated with hyperpigmentation, a common cause of uneven skin tone. Additionally, saffron's ability to inhibit melanin production contributes to its skin-lightening capabilities. This makes it a powerful ally in addressing age spots, sunspots, and other forms of hyperpigmentation, promoting a more uniform complexion.

Incorporating Saffron into Your Routine: Tips and Precautions

Saffron can be incorporated into your skincare routine in several ways. You can create a saffron-infused face mask by steeping saffron threads in warm milk (goat milk works exceptionally well!) for at least 30 minutes before applying the mixture to your face. Alternatively, you can add a few strands of saffron to your regular face cream or cleanser for a gentle boost of its brightening and anti-inflammatory properties. However, it is crucial to note that saffron is a potent ingredient, and moderation is key. Always start with a small amount to assess your skin's reaction and avoid potential irritation.

The Synergistic Duo: Combining Goat Milk and Saffron for Optimal Results

When combined, goat milk and saffron create a powerful synergy, amplifying their individual benefits for even greater skin brightening effects. The gentle exfoliation of goat milk prepares the skin for optimal saffron absorption, maximizing the impact of its anti-inflammatory and melanin-inhibiting properties. This collaborative approach offers a holistic and natural path towards achieving a radiant, more even-toned complexion. Remember, consistency is key. Regular application of these remedies, coupled with a healthy lifestyle and sun protection, will yield the best results.

Disclaimer: While goat milk and saffron are generally considered safe for topical use, individual reactions may vary. It's always recommended to perform a patch test before applying any new ingredient to your entire face. Consult a dermatologist if you have any concerns or pre-existing skin conditions.

Read More..

How to brighten dull skin naturally at home

Unleash Your Radiance: Naturally Brightening Dull Skin at Home

Tired of looking in the mirror and seeing dull, lackluster skin? You're not alone! Many factors contribute to a loss of that healthy glow, including stress, poor diet, lack of sleep, and environmental aggressors. But before you reach for harsh chemicals and expensive treatments, consider the power of nature. This guide provides effective, all-natural methods to brighten your complexion from the comfort of your own home, revealing the radiant skin you deserve.

Exfoliate for a Brighter You

Dead skin cells accumulate on the surface, creating a dull, uneven tone. Regular exfoliation is crucial for revealing the brighter skin underneath. Instead of harsh scrubs that can irritate sensitive skin, opt for gentle, natural alternatives. Twice a week, try a homemade sugar scrub. Mix equal parts granulated sugar (or fine sea salt for a more intense exfoliation) with a carrier oil like coconut or olive oil. Gently massage the mixture onto your face in circular motions, avoiding the delicate eye area. Rinse thoroughly with lukewarm water, and pat your skin dry. The sugar crystals gently remove dead cells, while the oil moisturizes, leaving your skin feeling soft and radiant.

Beyond Sugar Scrubs: Gentle Alternatives

If sugar feels too abrasive, consider using a gentle oatmeal scrub. Blend a handful of rolled oats into a fine powder. Mix with a little water or milk to form a paste, and apply as you would a sugar scrub. Oats are incredibly soothing and help to calm irritated skin. Alternatively, explore the power of baking soda. Mix a small amount with water to create a paste, apply gently, and rinse. However, use baking soda sparingly as it can be drying for some skin types.

Hydration is Key to Radiant Skin

Dehydrated skin looks dull and lifeless. Drinking plenty of water is essential, but you also need to moisturize from the outside. Choose a natural moisturizer that suits your skin type. Aloe vera gel is a fantastic option for its soothing and hydrating properties. Apply a thin layer after cleansing and exfoliating. Alternatively, consider using a rich natural oil like jojoba, rosehip, or argan oil. These oils closely mimic your skin's natural oils, providing deep hydration without clogging pores.

Boost Hydration with a Face Mask

Once or twice a week, treat your skin to a hydrating face mask. A simple honey mask is incredibly effective. Honey's natural humectant properties draw moisture into the skin, leaving it plump and radiant. Simply apply a thin layer of raw honey to your face, leave it on for 15-20 minutes, and rinse with lukewarm water. For extra hydration, mix the honey with a few drops of milk or yogurt.

Embrace the Power of Natural Ingredients

Many natural ingredients possess brightening properties. Lemon juice, rich in Vitamin C, is a potent antioxidant that can help to fade dark spots and even out skin tone. However, use it sparingly and always dilute it with water to avoid irritation. Apply diluted lemon juice to your skin at night and avoid sun exposure afterwards as it can increase sensitivity. Another excellent option is turmeric. This spice contains curcumin, which has anti-inflammatory and brightening properties. Mix turmeric powder with a little milk or yogurt to create a paste and apply as a face mask. Remember to always patch test any new ingredient before applying it to your entire face.

A Note on Consistency

Remember that achieving naturally brighter skin is a journey, not a sprint. Consistency is key. Incorporate these natural methods into your regular skincare routine, and you’ll gradually notice a significant improvement in your skin's tone and texture. Pay attention to your skin's reaction and adjust accordingly. What works wonders for one person might not be suitable for another, so always listen to your skin's needs.

Read More..

Traditional remedies for skin brightening: before and after

Unlocking Radiant Skin: Traditional Remedies for Skin Brightening â€" Before & After

Hey everyone! So, you're looking for ways to brighten your skin naturally? You've come to the right place! Let's dive into the world of traditional skin brightening remedies. I'm going to spill the tea on some age-old secrets, share some personal experiences (because who doesn't love a good before-and-after story?), and give you the lowdown on what works and what…well, maybe not so much.

The Allure of Naturally Bright Skin

For centuries, cultures around the globe have cherished radiant skin. It's not just about vanity; in many traditions, bright skin is associated with health, beauty, and even social status. Think about the elaborate beauty rituals of ancient Egyptian queens or the intricate skincare practices of traditional Chinese medicine. These weren't just fleeting trends; they represented deeply rooted beliefs in the power of nature to enhance beauty.

But let's be clear: "brightening" doesn't mean bleaching your skin to an unnatural shade. It's about achieving a more even, luminous complexion by addressing hyperpigmentation (those pesky dark spots), reducing dullness, and promoting a healthy glow. We're aiming for a natural enhancement, not a drastic transformation!

Tried and Tested Traditional Remedies

Now for the fun part â€" the remedies themselves! Remember, everyone's skin is different, so what works wonders for one person might not be as effective for another. Always do a patch test before applying anything new to your entire face.

The Power of Turmeric

Turmeric, the golden spice, is a superstar in many traditional skincare routines. It's packed with curcumin, a potent antioxidant with anti-inflammatory properties. I've personally used a turmeric face mask (mixed with a little yogurt and honey for extra hydration) a couple of times a week, and I noticed a significant reduction in my dark spots after about a month. My skin also felt smoother and looked brighter overall. Before, I had noticeable sunspots on my cheeks. After consistent use, they were significantly fainter, and my overall complexion looked more even-toned.

The Soothing Magic of Aloe Vera

Aloe vera is a classic for a reason! Its soothing and healing properties are well-documented. I've used aloe vera gel directly from the plant (if you can grow it, that's ideal!) to calm irritated skin and reduce redness. While it doesn't directly "brighten" in the same way turmeric does, it creates a healthy base for brighter skin by reducing inflammation and promoting cell regeneration. Before using it regularly, my skin was often red and irritated after sun exposure. After incorporating it into my routine, my skin recovered much faster and looked healthier.

The Gentle Exfoliation of Oatmeal

Forget harsh chemical scrubs! Oatmeal is a gentle yet effective exfoliant. Making a paste of finely ground oatmeal and water (or milk for extra hydration) creates a fantastic scrub that removes dead skin cells without irritation. This reveals brighter skin underneath. Before, my skin felt dull and rough. After regular oatmeal scrubbing (about once or twice a week), my skin felt smoother, and my complexion looked more radiant.

The Brightening Properties of Lemon Juice (Use with Caution!)

Lemon juice is often touted for its skin-brightening properties due to its high vitamin C content. However, it's crucial to use it with extreme caution! Lemon juice can be very acidic and can cause irritation or even sun sensitivity if not used properly. I would *strongly* advise diluting it significantly with water before applying it to your skin, and only using it sparingly. Before, I tried using undiluted lemon juice (don't do this!), and I ended up with a painful, irritated rash. After switching to a diluted version, the irritation subsided, but the brightening effects were minimal. I prefer other, gentler methods.

The Nourishing Benefits of Milk

Milk, particularly milk containing lactic acid, can act as a gentle exfoliant and can help to brighten skin. You can apply it directly or incorporate it into a mask with other ingredients. Many traditional recipes use milk for cleansing and brightening. This is a milder approach that is good for those with sensitive skin. Before using milk cleansers, my skin was prone to dryness. After regularly using milk-based cleansers, my skin felt hydrated and more balanced, leading to a more radiant appearance.

Consistency is Key!

Remember, these remedies aren't magic wands. They require consistency to see noticeable results. Don't expect overnight miracles! Be patient, stick to your routine, and listen to your skin. If you experience any adverse reactions, stop using the product immediately and consult a dermatologist.

Frequently Asked Questions (FAQs)

Q: How often should I use these remedies?

A: It varies depending on the remedy and your skin type. Start with once or twice a week and adjust based on your skin's reaction.

Q: Will these remedies work for all skin types?

A: Not necessarily. Always do a patch test first and consider your skin's sensitivity. Some remedies, like lemon juice, are more likely to cause irritation on sensitive skin.

Q: How long will it take to see results?

A: Results vary, but you might start to notice improvements within a few weeks of consistent use. Be patient and consistent!

Q: Can I combine these remedies?

A: You can, but proceed with caution. Start by combining only two at a time to see how your skin reacts. Avoid combining highly acidic ingredients.

Q: What if I don't see any results?

A: Everyone's skin is different. What works for one person might not work for another. If you're not seeing results after a few weeks of consistent use, it might be time to try a different approach or consult a dermatologist.

I hope this helps you on your journey to brighter, healthier skin! Remember, always prioritize gentle, consistent care. And if you have any questions or your own before-and-after stories to share, please leave a comment below!

Read More..

Before and after results of skin brightening with honey and oats

Honey & Oats for Brighter Skin: My Before & After Journey

Okay, so you've probably seen a million articles about honey and oats for skin brightening, but let me tell you, seeing is believing. I'm here to share my own personal experience â€" the good, the bad, and the slightly sticky! I've always had slightly uneven skin tone, and I'm super sensitive to harsh chemicals, so I was hesitant to try anything too strong. When I stumbled across all the buzz about honey and oats, I thought, "Why not? It's natural, it's gentle, and what's the worst that could happen?" Well, let me tell you, the worst that happened was maybe a little extra scrubbing in the shower, but the results? Totally worth it!

My Skin Before the Honey & Oats Adventure

Before I dive into the exciting after pictures (yes, I took pictures!), let's talk about my skin beforehand. I'd describe my skin as generally normal to slightly dry, with a tendency to get a bit dull and uneven in tone, particularly around my cheeks and forehead. I had some minor hyperpigmentation from old acne scars, and honestly, it just felt a bit lackluster. I'd tried a few store-bought brightening products, but they often left my skin feeling tight, dry, and sometimes even irritated. Plus, I'm a bit of a label-reader, and many of these contained ingredients I couldn't pronounce, let alone understand. So the thought of a natural, DIY approach was incredibly appealing.

The Search for the Perfect Recipe

I did a ton of research before starting. There are countless recipes online, using different types of honey (raw, manuka, etc.), various types of oats (rolled, ground, steel-cut), and even added ingredients like yogurt, lemon juice, or turmeric. I decided to start simple. I opted for raw honey (for its antioxidant and antibacterial properties) and finely ground rolled oats (for their gentle exfoliating power). I figured if a simple version didn't work, then I could always experiment with other additions later.

The Honey & Oats Mask: My DIY Recipe

My recipe was ridiculously easy. I mixed about two tablespoons of finely ground rolled oats with one tablespoon of raw honey. I used a small bowl and a fork to mix it until it formed a paste-like consistency. Not too thick, not too runny, just perfect for spreading on my face.

Applying the Mask: A Step-by-Step Guide

Applying the mask was pretty straightforward. I cleansed my face thoroughly, making sure to remove all makeup and dirt. Then, I gently applied the honey and oat mixture in a circular motion, avoiding the eye area. I let the mask sit for about 15-20 minutes, or until it had completely dried. It felt a little tingly, but nothing uncomfortable. While it dried, I usually relaxed and listened to a podcast. It was like a little at-home spa treatment!

The Big Reveal: Removing the Mask

Removing the mask was the fun part (and slightly messy!). I used warm water and gently massaged my face in circular motions to exfoliate. The oats acted as a really gentle scrub, removing dead skin cells and leaving my skin feeling incredibly smooth. It’s important to be gentle, though. You don't want to scrub too hard and irritate your skin.

My Results: The "After" Pictures

Okay, here's the moment of truth! After using the honey and oat mask consistently for about three weeks, two to three times a week, I noticed a significant difference in my skin. My skin tone appeared more even, and the hyperpigmentation from my old acne scars was noticeably lighter. My skin also felt softer, smoother, and had a healthy glow that I hadn't seen before. I'm not going to lie, I was thrilled! The improvement wasn't drastic, but it was subtle and natural-looking, which is exactly what I was aiming for.

Before pictures: [Insert Before Picture Here]

After pictures: [Insert After Picture Here]

(Note: I would recommend inserting actual before and after photos here for a more impactful visual demonstration.)

Maintaining the Results

Even though I saw great results, I didn't just stop there. I continued using the honey and oat mask once or twice a week as a maintenance treatment. I also focused on other aspects of my skincare routine, like using a gentle cleanser, a lightweight moisturizer, and sunscreen every day (this is crucial for protecting your skin from sun damage which can undo all your hard work!). Consistency is key!

Things to Keep in Mind

While honey and oats are generally safe for most skin types, it’s always a good idea to do a patch test first, especially if you have sensitive skin. Apply a small amount of the mask to a small area of your skin (like your inner arm) and wait 24 hours to see if you have any reactions. If you notice any redness, itching, or irritation, discontinue use.

Also, remember that results can vary depending on your skin type, the severity of hyperpigmentation, and your overall skincare routine. It’s not a miracle cure, but it's a fantastic natural remedy that can contribute to brighter, healthier skin.

Commonly Asked Questions

  • Q: How long did it take to see results? A: I started noticing a difference after about two weeks of consistent use, but the most significant improvement was seen after three weeks.
  • Q: Can I use this mask every day? A: While it's gentle, I wouldn't recommend using it every day. Two to three times a week is sufficient for most people. Over-exfoliation can irritate your skin.
  • Q: What type of honey should I use? A: Raw honey is generally preferred for its antioxidant properties, but you can experiment with different types.
  • Q: Can I add other ingredients? A: Yes! Many people add ingredients like yogurt (for extra moisture), lemon juice (for extra brightening), or turmeric (for anti-inflammatory benefits). Start with small amounts and see how your skin reacts.
  • Q: What if I have acne-prone skin? A: The honey's antibacterial properties can be beneficial for acne-prone skin. However, if you experience breakouts, reduce the frequency of use or try a different recipe.
  • Q: Is this a replacement for professional treatments? A: No, this is a natural remedy for improving skin tone and texture. It shouldn't replace professional treatments like chemical peels or laser therapies if you have significant hyperpigmentation issues.

I hope my experience helps! Remember, everyone's skin is different, so what works for me might not work exactly the same for you. But it's definitely worth trying this easy, natural, and affordable approach to brighter skin. Good luck, and let me know how it goes!

Read More..

Natural exfoliators for skin whitening at home

Unlock Your Radiance: Natural Exfoliators for Brighter Skin

Tired of uneven skin tone and dullness? You're not alone! Many people seek brighter, more radiant skin, and while harsh chemical treatments promise quick fixes, they often come with unwanted side effects. Fortunately, nature provides a treasure trove of gentle yet effective exfoliators that can help you achieve a luminous complexion from the comfort of your home. These natural options not only exfoliate dead skin cells but also often contain beneficial vitamins and antioxidants, promoting healthier, more even-toned skin over time. Prepare to discover the power of nature's ingredients for a naturally radiant you!

Understanding the Importance of Exfoliation

Before diving into specific natural exfoliants, it's crucial to understand why exfoliation is so important for achieving brighter skin. Our skin constantly sheds dead cells, but this process can sometimes slow down, leading to a buildup on the surface. This buildup can result in dullness, uneven texture, and clogged pores. Regular exfoliation removes this layer of dead skin, revealing the brighter, healthier skin underneath. However, the key is to exfoliate gently to avoid irritation. Harsh scrubbing can damage your skin, leading to redness, inflammation, and even increased pigmentation. That's where the gentle power of natural exfoliators comes in!

Top Natural Exfoliators for Brighter Skin

Several natural ingredients possess remarkable exfoliating properties, offering a gentle yet effective way to brighten your complexion. Remember to always perform a patch test on a small area of skin before applying any new product to your entire face to check for allergies or sensitivities.

1. Sugar: A Sweet Solution for Smooth Skin

Sugar, particularly granulated or brown sugar, provides a fantastic physical exfoliation. Its tiny crystals gently scrub away dead skin cells without causing significant irritation. To use sugar as an exfoliant, mix a tablespoon of sugar with a little honey and a splash of your favorite oil (like coconut or olive oil) to create a paste. Gently massage this mixture onto your damp skin in circular motions, then rinse thoroughly. The honey adds moisture, while the oil helps create a lubricating effect, reducing friction.

2. Oatmeal: Soothing and Exfoliating

Oatmeal isn't just for breakfast! It contains saponins, natural cleansing agents that gently exfoliate the skin. Plus, its anti-inflammatory properties soothe irritated skin. To create an oatmeal scrub, grind some dry oatmeal into a fine powder. Mix it with water or milk to form a paste and apply to your face. Gently massage and rinse. This method is especially beneficial for sensitive skin.

3. Coffee Grounds: A Wake-Up Call for Your Skin

Don't throw away those used coffee grounds! They're a fantastic natural exfoliant rich in antioxidants. The coarse texture helps to remove dead skin cells, while the antioxidants help to protect against damage and improve skin tone. Mix used coffee grounds with a little coconut oil or honey to form a paste and gently massage onto your skin. Rinse thoroughly afterwards. This scrub leaves your skin feeling wonderfully smooth and energized.

4. Baking Soda: A Versatile Kitchen Staple

Baking soda, a common household item, possesses mild exfoliating properties. However, use it cautiously, as it can be slightly abrasive. Mix a small amount of baking soda with water or honey to form a paste and apply it gently to your skin. Massage softly and rinse immediately. Avoid using baking soda too frequently, as it can be drying.

Important Considerations for Brightening Skin

While natural exfoliators are generally safe, consistency and proper usage are key to achieving results. Remember to:

  • Exfoliate gently, avoiding harsh scrubbing.
  • Use lukewarm water to rinse.
  • Moisturize your skin afterward to prevent dryness.
  • Limit exfoliation to 1-2 times per week, depending on your skin type.
  • Protect your skin from the sun by applying sunscreen daily.

By incorporating these natural exfoliants into your skincare routine and following these tips, you can reveal a brighter, more radiant complexion. Remember, patience is key. Consistent, gentle exfoliation coupled with a healthy lifestyle will help you achieve your skin goals naturally.

Read More..

How to brighten skin with simple traditional remedies

Unveiling Your Radiance: Simple Traditional Remedies for Brighter Skin

Yearning for a brighter, more radiant complexion? Before you reach for expensive creams and serums, consider the power of nature. For centuries, traditional remedies have harnessed the goodness of natural ingredients to enhance skin tone and texture. This article explores several simple, yet effective, methods to brighten your skin naturally, revealing the healthy glow you deserve.

The Power of Citrus

Citrus fruits, like lemons and oranges, are packed with Vitamin C â€" a potent antioxidant known for its skin-brightening properties. Vitamin C stimulates collagen production, improving skin elasticity and reducing the appearance of wrinkles. But caution is key! Direct application of lemon juice can be irritating for some, potentially causing sun sensitivity. Therefore, dilute it carefully.

Lemon Juice Face Mask

Prepare a simple face mask by mixing one teaspoon of freshly squeezed lemon juice with two teaspoons of plain yogurt or honey. Yogurt soothes and hydrates, while honey adds extra moisturizing benefits. Apply the mixture evenly to your cleansed face, avoiding the eye area. Leave it on for 15-20 minutes, then rinse with lukewarm water. Follow up with a moisturizer. Use this mask no more than twice a week to prevent skin irritation.

Nourishing with Turmeric

Turmeric, a vibrant golden spice, has been a staple in traditional medicine for centuries. Its active ingredient, curcumin, possesses powerful anti-inflammatory and antioxidant properties. This helps reduce blemishes, even out skin tone, and impart a natural radiance.

Turmeric and Gram Flour Face Mask

Combine one teaspoon of turmeric powder with two teaspoons of gram flour (besan) and enough milk or rose water to create a paste. Gram flour acts as a gentle exfoliant, removing dead skin cells and revealing brighter skin underneath. Apply the paste to your face and neck, leave it to dry completely (about 15-20 minutes), then gently rinse with lukewarm water. Start with a patch test to check for any allergic reactions before applying it to your entire face.

Gentle Exfoliation with Oats

Oats aren't just for breakfast; they're a fantastic natural exfoliant. Their gentle abrasiveness helps remove dead skin cells without causing irritation, revealing smoother, brighter skin. The anti-inflammatory properties of oats also soothe irritated skin.

Oatmeal Scrub

Grind a handful of rolled oats into a fine powder using a blender or coffee grinder. Mix the oat powder with a little water or milk to form a paste. Gently massage the paste onto your face in circular motions, avoiding harsh scrubbing. Rinse thoroughly with lukewarm water and pat your skin dry. Use this scrub once or twice a week for best results. This gentle exfoliation will prepare your skin for better absorption of other brightening treatments.

Maintaining a Healthy Lifestyle

While these natural remedies can significantly improve your skin's radiance, remember that a holistic approach is key. Drink plenty of water to keep your skin hydrated. Eat a balanced diet rich in fruits, vegetables, and antioxidants. Get enough sleep to allow your skin to repair itself. And protect your skin from the sun by using sunscreen with an SPF of 30 or higher daily. By combining these simple traditional remedies with a healthy lifestyle, you can unlock your skin's natural brilliance and unveil a radiant, healthy glow.

Read More..

How to brighten uneven skin tone with natural scrubs

Unmask Your Radiance: Brightening Uneven Skin Tone with Natural Scrubs

Do you dream of a luminous, even complexion? Uneven skin tone, often caused by sun damage, acne scarring, or hormonal changes, can be frustrating. But before you reach for harsh chemical treatments, consider the power of nature! Natural scrubs offer a gentle yet effective way to exfoliate, revealing brighter, more radiant skin underneath. This article will guide you through creating and using homemade scrubs to achieve a more even skin tone, leaving you feeling confident and refreshed.

Understanding Uneven Skin Tone

Uneven skin tone manifests in several ways: dark spots (hyperpigmentation), redness, and patchy discoloration. These imperfections arise from various factors. Sun exposure is a major culprit, as UV rays stimulate melanin production, leading to dark spots. Acne scarring can leave behind pitted or discolored areas. Hormonal fluctuations, particularly during pregnancy or menopause, can also trigger changes in skin pigmentation. Understanding these root causes helps you choose the right approach to treatment, and natural scrubs play a crucial role in addressing the visible effects.

The Magic of Natural Exfoliation

Natural scrubs work by gently removing dead skin cells, revealing the brighter, more even-toned skin underneath. Unlike harsh chemical exfoliants, they're less likely to irritate sensitive skin. The key lies in choosing the right ingredients. Effective natural exfoliants include:

Key Ingredients for Brightening Scrubs:

  • Sugar: A mild exfoliant that dissolves easily, leaving skin feeling smooth.
  • Coffee grounds: Rich in antioxidants, they help brighten the skin and reduce inflammation.
  • Oatmeal: Soothing and gentle, ideal for sensitive skin, it also helps to exfoliate and hydrate.
  • Rice flour: Finely ground rice creates a delicate scrub that polishes the skin without causing irritation.
  • Baking soda: A natural astringent that helps to balance pH levels and gently exfoliate. Use sparingly, as it can be drying.

DIY Natural Scrubs for Brighter Skin

Now for the fun part â€" creating your own customized scrub! Remember to always perform a patch test on a small area of skin before applying the scrub to your entire face to check for any allergic reactions.

Sugar & Honey Scrub:

Combine 2 tablespoons of granulated sugar with 1 tablespoon of honey. Honey's antibacterial and moisturizing properties complement the gentle exfoliation of the sugar. Gently massage onto damp skin in circular motions, rinse with lukewarm water, and pat dry. This simple scrub is perfect for all skin types.

Coffee & Coconut Oil Scrub:

Mix 1 tablespoon of used coffee grounds (cooled) with 1 tablespoon of coconut oil. The coffee grounds exfoliate, while the coconut oil moisturizes and adds a delightful aroma. Apply to damp skin, massage gently, and rinse thoroughly. This scrub is especially beneficial for reducing the appearance of cellulite when used on the body.

Oatmeal & Yogurt Scrub:

Blend 1/4 cup of rolled oats into a fine powder. Mix with 2 tablespoons of plain yogurt (rich in lactic acid, a natural exfoliant). Apply this soothing scrub to your face, gently massage, and rinse with cool water. This is a fantastic option for sensitive or dry skin.

Maintaining Your Radiant Results

While natural scrubs can significantly improve your skin tone, consistency is key. Aim to use a scrub 1-2 times a week, depending on your skin type. Remember to follow up with a moisturizer to hydrate and protect your skin. In addition to scrubbing, protect your skin from the sun with a broad-spectrum sunscreen daily, even on cloudy days. This will help prevent future hyperpigmentation and maintain your brighter, more even complexion.

By incorporating these natural scrubs into your skincare routine and following these tips, you can unlock your skin's natural radiance and confidently embrace a more even skin tone. Remember to listen to your skin and adjust the frequency and type of scrub accordingly. Enjoy the journey to your most beautiful, healthy-looking skin!

Read More..

Quick skin whitening at home with turmeric and milk

Unlock Your Radiance: A Turmeric & Milk Guide to Brighter Skin

Hey everyone! So you're looking for a natural way to brighten your skin, and you've landed on the turmeric and milk combo â€" fantastic choice! This ancient remedy has been used for centuries, and for good reason. It's gentle, relatively inexpensive, and can actually make a noticeable difference in your skin's tone and glow. But before we dive into the specifics, let's be clear: "Whitening" can be a loaded term. We're talking about achieving a more even skin tone, reducing hyperpigmentation (those pesky dark spots!), and generally enhancing your natural radiance. We're not aiming for drastic color changes; rather, we're focusing on a healthier, brighter you.

Understanding the Power Duo: Turmeric and Milk

Turmeric and milk are a match made in skincare heaven! Let's break down why:

Turmeric: The Golden Elixir

Turmeric, that vibrant orange spice, contains curcumin â€" the star ingredient responsible for its amazing skin benefits. Curcumin is a potent antioxidant and anti-inflammatory agent. What does that mean for your skin? Well, it helps fight free radical damage (those sneaky things that contribute to aging and dullness), reduces inflammation (which can cause redness and breakouts), and even helps fade dark spots and hyperpigmentation. It's truly a multi-tasker!

Milk: The Soothing Moisturizer

Milk, especially raw milk, is packed with beneficial nutrients. It's rich in lactic acid, a natural alpha-hydroxy acid (AHA). AHAs are known for gently exfoliating the skin, removing dead skin cells that can make your complexion look dull and uneven. This reveals brighter, smoother skin underneath. Plus, milk contains fats and proteins that moisturize and nourish your skin, leaving it soft and supple.

Crafting Your Turmeric & Milk Mask: Simple Recipes

Now for the fun part â€" making your own magical mask! Here are a couple of easy recipes to get you started. Remember, consistency is key! You’ll likely see better results with regular use.

Recipe 1: The Classic Blend

This is a simple, straightforward recipe perfect for beginners.

  • 1 tablespoon turmeric powder
  • 2-3 tablespoons milk (raw milk is best, but any kind will work)

Mix the turmeric and milk until you achieve a paste-like consistency. You want it thick enough to stay on your face but not so thick that it's difficult to spread.

Recipe 2: The Enhanced Elixir

Want to boost the benefits? Try this recipe with added ingredients for extra nourishment and glow:

  • 1 tablespoon turmeric powder
  • 2 tablespoons milk
  • 1 teaspoon honey (for extra moisture and soothing properties)
  • ½ teaspoon lemon juice (use cautiously, as it can increase sun sensitivity â€" always use sunscreen afterward!)

Mix everything together until you have a smooth paste.

Applying Your Mask: Tips for Success

Now that your mask is ready, let’s talk about application. A little preparation goes a long way!

  • Cleanse your face: Start with a clean face, free of makeup and dirt. This ensures the mask can penetrate effectively.
  • Patch test: Before applying it all over your face, do a patch test on a small area of skin (like your inner arm) to check for any allergic reactions. Wait for at least 24 hours to see if any irritation occurs.
  • Apply evenly: Gently spread the mask evenly over your face, avoiding the eye area. Let it sit for about 15-20 minutes.
  • Rinse thoroughly: Rinse off the mask with lukewarm water, making sure to remove all traces. Pat your skin dry with a soft towel.
  • Moisturize: Follow up with a gentle moisturizer to keep your skin hydrated.
  • Consistency is key: Aim for 2-3 times a week for optimal results. Don't expect miracles overnight; consistent use is crucial.

Important Considerations and Cautions

While turmeric and milk are generally safe, there are a few things to keep in mind:

  • Sun sensitivity: Turmeric can make your skin more sensitive to the sun. Always apply sunscreen with a high SPF (at least 30) when you go outdoors after using a turmeric mask, especially during the day.
  • Potential staining: Turmeric can stain clothes and fabrics. Be careful when applying the mask and wear old clothes you don't mind getting stained.
  • Skin type: If you have very sensitive skin, start with a small amount of turmeric and monitor your skin's reaction. If you experience any irritation, discontinue use.
  • Pre-existing conditions: If you have any pre-existing skin conditions (like eczema or psoriasis), consult a dermatologist before using turmeric on your face.

Beyond the Mask: Enhancing Your Radiance

Remember, a radiant complexion is a result of a holistic approach. While the turmeric and milk mask can help, consider incorporating these habits into your routine:

  • Hydration: Drink plenty of water to keep your skin hydrated from the inside out.
  • Healthy diet: Eat a balanced diet rich in fruits, vegetables, and antioxidants.
  • Adequate sleep: Aim for 7-8 hours of quality sleep each night. Sleep deprivation can affect your skin's appearance.
  • Stress management: Stress can contribute to skin problems. Find healthy ways to manage stress, such as exercise, meditation, or yoga.
  • Gentle cleansing: Use a gentle cleanser suited to your skin type to avoid stripping your skin of its natural oils.

Frequently Asked Questions (FAQs)

Q: How long does it take to see results?

A: Results vary depending on individual skin types and consistency of use. Some people see a noticeable difference within a few weeks, while others may take longer. Be patient and consistent!

Q: Can I use this mask every day?

A: It's generally recommended to use the mask 2-3 times a week. Overuse can potentially irritate your skin.

Q: Will this mask lighten my skin drastically?

A: No, this mask is not designed for drastic skin lightening. It aims to improve your skin's overall tone, reduce hyperpigmentation, and enhance your natural radiance.

Q: What should I do if I experience irritation?

A: If you experience any irritation, redness, or itching, discontinue use immediately and wash your face thoroughly. Consult a dermatologist if the irritation persists.

Q: Can I use this mask if I'm pregnant or breastfeeding?

A: While turmeric and milk are generally considered safe, it's always best to consult your doctor before using any new skincare products during pregnancy or breastfeeding.

I hope this comprehensive guide helps you on your journey to brighter, more radiant skin! Remember, consistency and patience are key. And as always, listen to your skin â€" if something doesn't feel right, stop using it and consult a professional.

Read More..

How to whiten skin using mung bean powder and rose water

Utilizing Mung Bean Powder and Rose Water for Skin Whitening: A Comprehensive Guide

The pursuit of radiant and even-toned skin is a common aspiration across cultures. While numerous commercial products promise skin whitening, many individuals are seeking natural and gentler alternatives. Mung bean powder and rose water, both celebrated for their skin-beneficial properties, offer a potentially effective and accessible approach to achieving a brighter complexion. This comprehensive guide explores the individual benefits of these ingredients, outlines the methods of preparation and application, and addresses potential considerations for safe and effective use.

Understanding the Individual Benefits of Mung Bean Powder and Rose Water

The efficacy of a mung bean powder and rose water skin whitening treatment stems from the synergistic properties of each ingredient. Let's examine their individual contributions:

Mung Bean Powder: A Multifaceted Skin Ally

Mung bean powder, derived from the humble mung bean (Vigna radiata), is a rich source of various nutrients beneficial for skin health. Its remarkable properties include:

  • Exfoliation: Mung bean powder possesses gentle exfoliating properties, helping to remove dead skin cells that can dull the complexion. This process reveals brighter, more radiant skin underneath. The mild abrasive nature of the powder makes it suitable even for sensitive skin types, though caution and a gentle approach remain essential.
  • Antioxidant Protection: Mung beans are packed with antioxidants, including vitamin C and various flavonoids. These potent compounds combat free radical damage, which contributes to premature aging and uneven skin tone. By neutralizing free radicals, mung bean powder helps protect the skin from environmental stressors and promotes a more youthful appearance.
  • Soothing and Anti-inflammatory Effects: Mung bean powder displays soothing and anti-inflammatory properties, making it suitable for individuals with sensitive or irritated skin. It can help calm redness and inflammation, contributing to a more even and healthy complexion.
  • Sebum Regulation: The powder may help regulate sebum production, beneficial for individuals with oily or acne-prone skin. Excessive sebum can lead to clogged pores and breakouts; regulating sebum production can improve skin clarity and reduce the likelihood of blemishes.
  • Wound Healing: Certain studies suggest that mung bean extract possesses wound-healing properties. While further research is needed to fully understand its mechanism in topical applications, this hints at its potential to promote skin repair and regeneration.

Rose Water: A Natural Toner and Skin Soother

Rose water, a fragrant and gentle hydrosol, offers a range of benefits for the skin:

  • Toning and Cleansing: Rose water acts as a natural toner, helping to balance the skin's pH level. This contributes to a healthier skin barrier, reducing the susceptibility to irritation and inflammation. Its gentle cleansing properties help remove dirt, grime, and excess oil without stripping the skin of its natural moisture.
  • Antioxidant and Anti-inflammatory Actions: Like mung bean powder, rose water contains antioxidants that combat free radical damage. Its anti-inflammatory properties can soothe irritated skin and reduce redness.
  • Hydration: Rose water provides gentle hydration, helping to improve skin moisture levels and prevent dryness. This is particularly beneficial for individuals with dry or dehydrated skin, promoting a supple and radiant appearance.
  • Skin Brightening: Some studies suggest that rose water may have skin-brightening effects, contributing to a more even and radiant complexion. This effect may be due to its antioxidant and anti-inflammatory properties, which combat factors contributing to uneven pigmentation.

Preparing and Applying the Mung Bean Powder and Rose Water Mask

The preparation of a mung bean powder and rose water mask is simple and straightforward. However, maintaining consistency and using high-quality ingredients are crucial for optimal results.

Step-by-Step Preparation

  1. Gather your ingredients: You will need organic mung bean powder (finely ground for optimal application) and pure rose water. Avoid using rose water containing added fragrances or preservatives.
  2. Mix the ingredients: In a small bowl, combine the mung bean powder and rose water gradually, stirring until a smooth paste is formed. The consistency should be thick enough to adhere to the skin but not so thick that it is difficult to spread.
  3. Test for allergies: Before applying the mask to your entire face, perform a patch test on a small area of skin (e.g., inner arm) to check for any allergic reactions. Wait for at least 24 hours to observe any adverse effects.
  4. Apply the mask: Gently apply the paste to your cleansed face, avoiding the eye area. Ensure an even distribution across the skin.
  5. Leave the mask on: Allow the mask to remain on your face for 15-20 minutes, or until it is completely dry. This allows the ingredients to penetrate the skin and exert their benefits.
  6. Rinse and moisturize: Gently rinse the mask off with lukewarm water using circular motions. Pat your face dry with a soft towel and apply a moisturizer suitable for your skin type.

Frequency of Application and Considerations

The frequency of application depends on your skin type and individual response. Generally, applying the mask 1-2 times per week is sufficient. For individuals with sensitive skin, starting with once a week and monitoring for any reactions is recommended. If you experience any irritation, redness, or other adverse effects, discontinue use and consult a dermatologist.

Important Note: While mung bean powder and rose water are generally considered safe, individual reactions can vary. Always conduct a patch test before full application. If you have any pre-existing skin conditions or concerns, consult a dermatologist before incorporating this treatment into your skincare routine. Sunlight exposure can impact skin sensitivity, so it is advisable to use this treatment in the evening and avoid sun exposure directly after application.

Maintaining Realistic Expectations and Supporting Practices

It is crucial to understand that skin whitening treatments, even natural ones, are not a quick fix. Consistent application and a holistic approach are essential for optimal results. While mung bean powder and rose water can contribute to a brighter and more even complexion, they are not miracle cures. Significant changes in skin tone usually take time and consistent effort.

To complement the benefits of the mung bean and rose water mask, consider these supporting practices:

  • Sun Protection: Consistent use of sunscreen with an SPF of 30 or higher is crucial to protect your skin from the sun's harmful UV rays, which can exacerbate hyperpigmentation and uneven skin tone.
  • Hydration: Drinking plenty of water keeps your skin hydrated from within, contributing to a healthy and radiant appearance.
  • Healthy Diet: A balanced diet rich in fruits, vegetables, and antioxidants supports overall skin health and can contribute to a brighter complexion.
  • Adequate Sleep: Getting enough sleep allows your skin to repair and regenerate itself, contributing to a healthier and more radiant appearance.
  • Stress Management: Stress can negatively impact skin health. Practicing stress-reducing techniques such as yoga, meditation, or spending time in nature can benefit both your mental and physical well-being, including your skin.

In conclusion, a mung bean powder and rose water mask offers a gentle and potentially effective approach to achieving a brighter and more even complexion. However, realistic expectations, consistent application, and supportive practices are essential for optimal results. Always prioritize skin health and consult a dermatologist if you have any concerns or pre-existing skin conditions.

Read More..

How to use yogurt and lemon to brighten skin tone

Unlock Your Radiance: A Yogurt and Lemon Skin Brightening Guide

Dreaming of a brighter, more even complexion? Look no further than your kitchen! Yogurt and lemon, two readily available pantry staples, possess remarkable skin-brightening properties. This guide reveals how to harness their power to achieve a naturally radiant glow, safely and effectively.

Understanding the Power Duo

The magic lies in the combined action of yogurt and lemon. Yogurt, rich in lactic acid, acts as a gentle exfoliant, removing dead skin cells that dull your complexion. Lactic acid also helps to stimulate cell turnover, revealing brighter skin underneath. Meanwhile, lemon, packed with vitamin C, a potent antioxidant, brightens the skin by inhibiting melanin production (the pigment responsible for skin color). Vitamin C also boosts collagen production, leading to firmer, more youthful-looking skin. However, it's crucial to use lemon juice judiciously, as its acidity can be irritating to sensitive skin.

Creating Your Brightening Masks

We'll explore two effective recipes, catering to different skin types and preferences. Remember to always perform a patch test on a small area of skin before applying any mask to your entire face to check for allergic reactions.

The Classic Yogurt and Lemon Mask

This simple recipe is perfect for those with normal to oily skin. You will need:

  • 2 tablespoons plain yogurt (Greek yogurt works best for its thicker consistency)
  • 1/2 tablespoon fresh lemon juice

Instructions: Thoroughly mix the yogurt and lemon juice in a small bowl. Apply the mixture evenly to your cleansed face, avoiding the eye area. Leave it on for 10-15 minutes, then rinse with lukewarm water and pat your skin dry. Follow up with your favorite moisturizer.

The Soothing Yogurt and Honey Mask

For sensitive or dry skin, this recipe incorporates honey for its moisturizing and soothing properties. You will need:

  • 2 tablespoons plain yogurt
  • 1/4 tablespoon fresh lemon juice
  • 1 tablespoon raw honey

Instructions: Combine all ingredients until well blended. Apply the mask to your cleansed face, avoiding the eye area. Let it sit for 15-20 minutes, then rinse with lukewarm water and gently pat your skin dry. Finish with a moisturizer.

Important Considerations and Tips

While yogurt and lemon are generally safe, remember these crucial points:

  • Start slowly: Begin with less lemon juice than the recipes suggest, especially if you have sensitive skin. You can always add more in subsequent applications if needed.
  • Sun protection is key: Vitamin C can increase your skin's sensitivity to the sun. Always apply a broad-spectrum sunscreen with an SPF of 30 or higher after using these masks, especially before going outdoors.
  • Frequency matters: Use these masks 1-2 times a week, maximum. Overuse can lead to irritation and dryness.
  • Listen to your skin: If you experience any burning, stinging, or redness, rinse the mask off immediately and discontinue use.

With consistent use and proper care, these simple yet effective masks will help you reveal a brighter, more radiant complexion. Embrace the natural power of yogurt and lemon and unlock your skin’s inner glow!

Read More..